

Last Updated: October 28, 2026
Quick Summary
To choose a streaming microphone, match the connection, pickup pattern and price to your room and your content. USB mics plug straight into your computer and suit most beginners, while a dynamic microphone rejects background noise better in untreated rooms.
- USB suits most people starting out because it plugs straight into a computer.
- XLR needs an audio interface or mixer but offers more control and upgrades.
- Choose a dynamic microphone if your room has keyboard clatter, loud fans or untreated walls.
- Set gain so your loudest speech peaks around -12 dB to avoid clipping.
- Record 30 seconds of speech on your phone from your normal seat before buying.
Table of Contents
- What a Streaming Microphone Needs to Do for Your Setup
- USB vs XLR for Streaming: Which Connection Fits Your Setup
- Dynamic or Condenser, and Why Pickup Pattern Matters
- Room Acoustics and Background Noise: Choosing for Your Space
- Best Budget Microphones for Streaming and What to Expect at Each Price
- How to Improve Streaming Audio Quality After You Buy
- Essential Streaming Audio Accessories and Your Next Step
- Frequently Asked Questions
What a Streaming Microphone Needs to Do for Your Setup
Choosing a streaming microphone starts with one question: what does your audience need to hear? They compare specs and prices, then discover that the microphone that sounds great in a quiet room picks up keyboard clatter and fan noise on stream. The right choice depends on your room, your connection, and the kind of content you make, not just the headline specs.
A streaming microphone has three jobs. It must capture your voice clearly, reject the sounds around you, and connect to your computer without a fight. Focus on those three requirements before you look at any product page. Once you know which one matters most for your setup, the rest of the decision becomes much simpler.
Start by listing what you actually use the mic for. A gamer who talks through competitive matches needs fast, clear pickup and low latency. A podcaster recording a seated interview needs warm, detailed vocals. A student attending online classes needs a mic that works reliably for hours of speech. Writing down your top two uses will narrow the field considerably.
USB vs XLR for Streaming: Which Connection Fits Your Setup
The connection type is often the first decision you face, and it shapes everything after. A USB microphone plugs straight into your computer and works with almost no extra gear. An XLR microphone requires an audio interface or mixer to convert its analog signal, but it offers more control over gain, monitoring, and upgrades down the line.
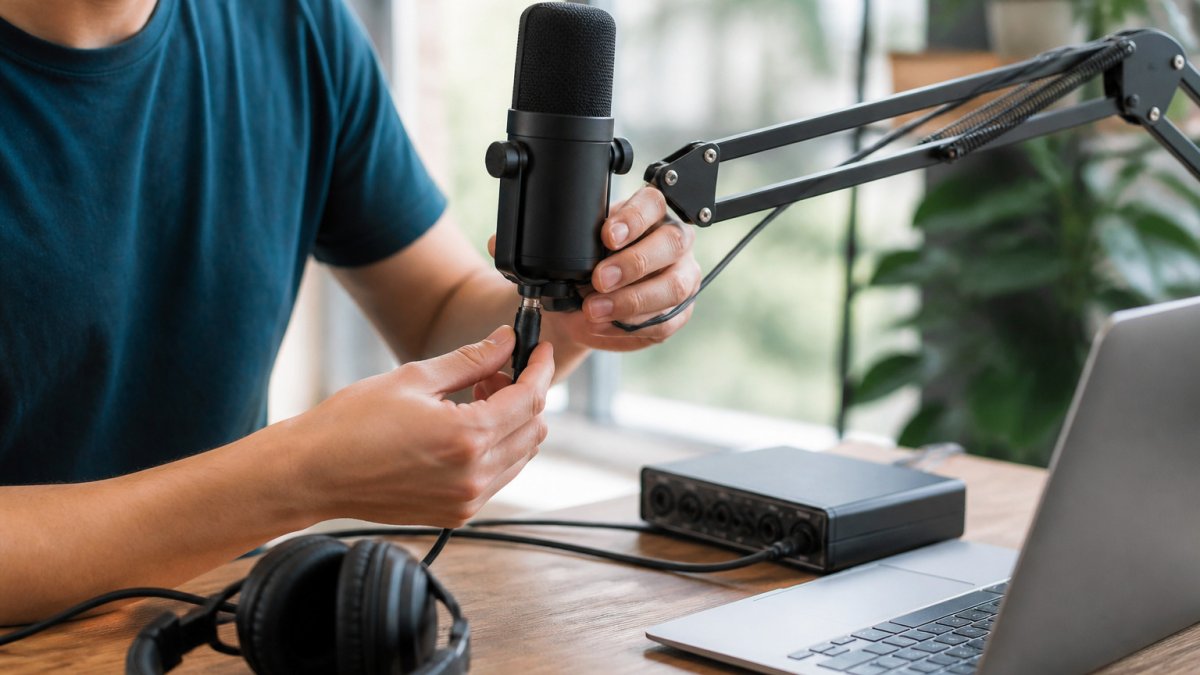
For most people starting out, USB is the practical choice. Our USB options, such as the Capacitor Microphone Usb Computer Desktop Notebook, provide a 24-bit, 192kHz sampling setup with a heart-shaped pickup pattern.

XLR makes sense when you expect to grow. An audio interface adds preamp quality and lets you run multiple inputs, which matters if you plan to add guests, instruments, or a second mic later. The trade-off is cost and complexity: you need the interface, the cable, and enough desk space to hold everything. Choose XLR if you already know you will outgrow USB within a year.
Watch out: Buying an XLR mic without an interface leaves it silent. Price the interface into your budget from the start.
The two connection types differ in setup cost, complexity and upgrade path.
| Connection | Best for | Key difference |
|---|---|---|
| USB | Most people starting out | Plugs straight into your computer |
| XLR | Creators who expect to grow | Needs an audio interface or mixer |
Dynamic or Condenser, and Why Pickup Pattern Matters
The dynamic-versus-condenser question is really a question about your room. Both types can sound excellent; they differ in how much of the room they invite into the recording.
A dynamic microphone uses a moving coil and magnet. It is less sensitive by design, which means it needs more gain but naturally rejects distant sound, keyboard clatter, fan hum, a roommate's TV. Most broadcast and podcasting dynamics are also built to be used close to the mouth, which further improves the ratio of voice to background. The trade-off is that a dynamic mic can sound duller or less detailed on a quiet, well-treated voice, and it demands a preamp with enough clean gain.
A condenser microphone uses a charged diaphragm and captures finer detail and faster transients. That sensitivity is a gift in a treated room and a liability in an untreated one: it will faithfully record your voice and your computer fan with equal care. Large-diaphragm condensers suit seated, scripted content in a controlled space; small-diaphragm condensers are common for instruments and detailed speech. You can compare a large diaphragm microphone condenser square option side by side with dynamic models.
A practical decision framework, based on the conditions most streamers actually face:
- Mechanical keyboard, loud fans, shared apartment, or untreated walls: start with a dynamic microphone. The lower sensitivity does more for your stream than any software noise gate.
- Quiet, carpeted room with soft furnishings and no HVAC noise: a condenser will reward you with more vocal detail.
- Mixed conditions or a room you cannot change: a dynamic mic plus close placement (a few centimetres from the mouth, off-axis) is the safer default.
- You plan to record music or instruments later: a condenser is more versatile for those sources.
Pickup pattern is the second half of the decision. Pattern describes which directions the microphone listens to:
- Cardioid captures mainly from the front and rejects the rear. It is the standard for a single speaker at a desk and the pattern to look for first.
- Supercardioid and hypercardioid are tighter and reject more from the sides, but they pick up a lobe directly behind the mic, useful in noisy rooms if you aim the rear null at your keyboard or monitor.
- Omnidirectional captures the whole room. It is the wrong choice for streaming unless you specifically want ambient sound.
- Figure-8 captures front and back and rejects the sides; it is mainly a two-person or interview pattern.
Check the spec sheet rather than the product photos.
Room Acoustics and Background Noise: Choosing for Your Space
The room you record in matters as much as the microphone. Hard walls, bare floors, and glass reflect sound and produce echo that no microphone can remove. Soft furnishings, rugs, and curtains absorb reflections and make any mic sound better. Before you spend heavily on gear, spend a few minutes treating the space you will record in.
Background noise is the main reason streams sound amateur. Fans, air conditioners, traffic, and typing all compete with your voice. If your room is noisy, a dynamic noise reduction multifunctional microphone is built for exactly that environment.
Capacitor Microphone Usb Computer Desktop Notebook →
Best Budget Microphones for Streaming and What to Expect at Each Price
Budget microphones have improved a great deal, but price still shapes what you get. Entry-level USB mics handle voice clearly in a controlled room and are a sensible starting point for most creators. You can find a low-cost microphone recording USB microphone to start with. Expect to trade away some detail, build quality, and noise rejection compared with pricier options.
Test your mic by recording a minute of speech, listening back on headphones, and checking for echo and background noise.
How to Improve Streaming Audio Quality After You Buy
Most buying guides stop at the purchase. Work through this list in order; each item maps to a symptom you can hear.
Clipping (distorted, crunchy peaks). Set gain so your loudest speech peaks around -12 dB, not 0 dB. Leave headroom for laughter and sudden volume. If your interface or mic has a gain knob, raise it until normal speech sits around -18 to -12 dB, then stop.
Hum or buzz. A steady low hum is usually a ground loop or a nearby power source. Move the mic cable away from power strips and monitor cables, plug the computer and interface into the same outlet, and avoid running unbalanced cables long distances. If the hum appears only when a laptop charger is connected, that is a classic ground-loop symptom.
Echo or roominess. Echo is a room problem, not a mic problem. Move closer to the mic, add soft furnishings behind and beside you, and angle the mic so its rear null faces the most reflective surface. A blanket or moving blanket behind the monitor is an inexpensive first treatment.
Latency (hearing yourself late). Monitor through your interface's direct-monitoring feature rather than through software, which adds buffering. If you must monitor in software, lower the buffer size until latency is acceptable, and accept that very low buffers can cause dropouts on slower machines.
Plosives (popped P and B sounds). Angle the mic slightly off-axis so you speak across the capsule rather than into it, and add a pop filter 5-10 cm from the grille. A foam windscreen helps but is less effective than a proper pop filter.
Inconsistent levels between sessions. Pick one gain setting and one mic distance and keep them. Mark the distance with a boom-arm position or a small reference on your desk. Consistency matters more than any single setting, because your audience adjusts to a stable voice level.
Wrong input or sample-rate mismatch. Confirm the correct device is selected in your streaming software and that the sample rate matches the device (commonly 48 kHz for streaming). A mismatch can cause crackles, pitch shifts, or a silent track.
Monitor yourself on headphones during every stream so you catch problems before your audience does. Record a one-minute test before going live, listen back, and fix the loudest problem first. That habit improves audio more reliably than any upgrade.
Essential Streaming Audio Accessories and Your Next Step
Your next step depends on where you are now. If you are starting from scratch, choose a USB mic that fits your room and budget, and test before you go live. If you already have a mic, spend your next dollar on whatever fixes your biggest problem, whether that is noise, echo, or positioning. You can browse the full range of streaming accessories in one place.
Choosing the right streaming microphone comes down to matching the connection, pickup pattern, and price to your room and your content. Start with the question you answered at the beginning, and let your real recording environment guide each choice from there.
Frequently Asked Questions
Should I choose a USB or XLR microphone for streaming?
For most streamers starting out, a USB microphone is the simpler choice. It plugs directly into your computer, needs no separate audio interface, and works with most streaming software out of the box. XLR microphones deliver more control over gain and sound, and they suit creators who plan to upgrade their sound over time, but they require an audio interface or mixer to connect. If you want the fastest setup with the fewest parts, start with USB. If you already own an interface or expect to grow into one, XLR gives you a longer upgrade path.
What is the difference between dynamic and condenser microphones for streaming?
Dynamic microphones are rugged and less sensitive to background noise, which makes them a good fit for untreated rooms, shared spaces, and loud keyboards. Condenser microphones are more sensitive and capture more detail and warmth, but they also pick up more room sound and typing noise, so they work best in a quiet, treated space. Many streamers in home environments choose a dynamic microphone for practical noise control, while those with a controlled room often prefer a condenser for a fuller voice.
Do I need a boom arm and pop filter for my streaming microphone?
A boom arm is not strictly required, but it keeps the microphone at a consistent distance from your mouth and frees desk space. A pop filter or windscreen reduces plosive sounds such as hard P and B letters, which can cause sudden bursts of air on the capsule. A basic pop filter costs little and makes a noticeable difference to voice clarity, so it is worth adding even on a budget setup. Place the microphone a fist-width or so from your mouth and angle it slightly off-axis to limit those bursts.
How much should I spend on a good streaming microphone?
You do not need to spend $300 or more to sound clear on stream. Entry-level USB microphones in the $40 to $140 range can deliver solid voice quality for part-time streaming, provided placement and gain are set correctly. Our catalog includes options from about $44 to $141, and the differences between them come down to frequency response, sampling specifications, and included accessories such as shock mounts and windshields. Spend more when you need better rejection of room noise or plan to stream full-time.
Does microphone polar pattern matter for streaming?
Yes. The polar pattern describes which directions a microphone picks up sound from.
